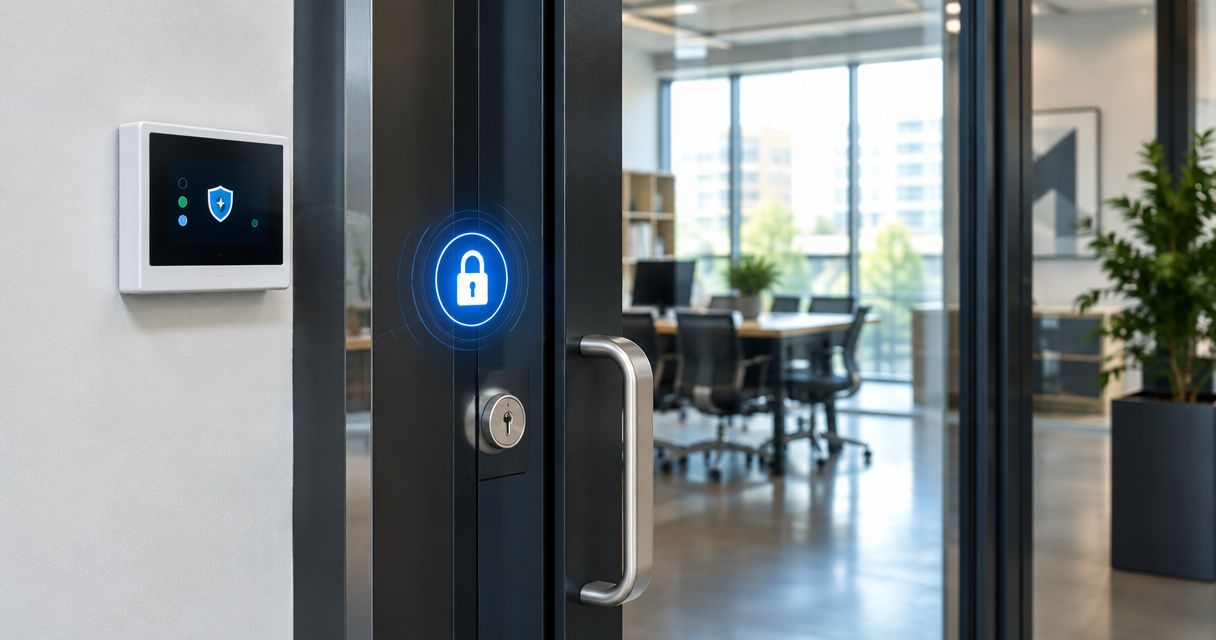
Instead of manually checking each entrance after closing, automatically lock commercial doors when alarm arms by connecting the alarm’s confirmed armed state to a compatible access-control controller. This 2026 guide explains the setup, safety checks, and failure handling; Apex Lock N Key provides commercial lock and access-control installation in Middlesex County, Massachusetts.
- To automatically lock commercial doors when alarm arms, use a supported alarm-to-access-control connection with verified door status.
- Apex Lock N Key provides commercial locksmith services for Middlesex County businesses needing lock and access-control installation.
- Trigger exterior locking after confirmed arming, not when someone starts the exit countdown.
- Preserve required emergency exit operation; an intrusion alarm must never override life-safety release.
- Treat a lock command, a closed door, and confirmed locking as separate signals.
Why this matters
An armed alarm does not prove that a commercial door is locked. Alarm systems detect conditions; door hardware controls entry. Connecting those functions removes a manual locking step, but only when the connection includes the right trigger, compatible hardware, and a way to identify failures.
The closing workflow must also account for anyone still inside. Locking the outside entrance must not prevent required exit operation or defeat an approved emergency-release arrangement.
Apex Lock N Key is best for Middlesex County businesses needing commercial lock and access-control installation. The company is a licensed, 24/7 mobile locksmith service. For alarm programming and integration support, establish responsibility with the alarm provider rather than assuming locksmith installation includes those tasks.
For a 2026 project, separate the work into door hardware, alarm signaling, and controller programming. Assign an owner to each part before changing anything.
Before you start
- Gather authorized access and documentation. You need permission to change the system, the alarm and controller model details, installer documentation, and administrative access. Arrange installer participation where programming requires restricted permissions.
- Confirm hardware and integration support. Identify the electric lock, its power supply, door-position sensor, available lock-status feedback, and the manufacturer-supported connection between the alarm and access controller. Agree on who handles wiring, programming, monitoring, and acceptance testing.
- Resolve the non-obvious gotcha: arming is not armed. An exit countdown, partial arming, and completed away arming are different events. Select the exact state that matches closing, and have the installer confirm required exit operation and emergency-release behavior before enabling automation.
Do not proceed with undocumented relay terminals, guessed wiring, or a residential automation routine substituted for a commercial safety design. A compatible connection on paper still needs testing at the actual door.
Alarm-to-door connection
Choose the connection your installed equipment supports. A software integration and a wired signal can both carry alarm state, but they have different requirements. Neither automatically proves that a door has secured.
| Connection | Best for | Advantage | Limitation |
|---|---|---|---|
| Manufacturer-supported software integration | Systems with documented alarm and access-control compatibility | Can expose defined alarm states and controller events | Requires supported equipment, permissions, and an understood failure response |
| Documented relay-to-controller input | Systems supporting an armed-state output and a suitable controller input | Provides a direct electrical state signal | A basic contact does not identify every alarm mode or confirm door locking |
Use the documented connection, not whichever connection looks easiest. Ask whether the alarm output represents the whole building or a particular partition. A partition is a separately controlled alarm area; arming one area must not unintentionally change doors belonging to another.
The steps below describe configuration functions, not universal menu labels. Follow the installed manufacturers’ instructions for exact fields and buttons. Commercial controllers do not share a single interface, and choosing a similar-looking setting is not a substitute for checking its documented behavior.
For the broader connection design, see the guide to connecting access control to an alarm system.
Armed-state trigger
- Identify the alarm area that controls the intended doors. Record whether the building uses one alarm area or several independently armed partitions.
- Select the documented event or output representing completed arming in the closing mode. Exclude the initial arm request and exit countdown unless the approved design explicitly requires different behavior.
- Have the installer establish the supported software connection or relay-to-controller interface. Follow the equipment’s electrical ratings and installation instructions; do not connect lock power directly to an undocumented alarm output.
- Observe the signal while the system is disarmed, counting down, and fully armed. Confirm that the controller receives the intended state and does not confuse a communication fault with a valid arm event.
Expected result: The access controller identifies completed arming for the correct area. Starting an exit countdown alone does not activate the closing rule.
Check cancellation as well. If a user cancels arming before completion, the closing workflow must not continue as though the building were armed.
Exterior locking policy
- Start with 1 pilot door before assigning the rule to a larger door group. Choose a door whose hardware and exit operation the installer has already checked.
- Define what securing that door means. Depending on the approved hardware, the action can mean ending scheduled public entry, securing an electric lock, or restoring credential-only access.
- Assign only the intended exterior doors. Keep unrelated interior rooms, shared entrances, and separately managed tenant spaces outside the rule unless explicitly included in the design.
- Check rule priority. A public-entry schedule must not undo the closing action, while required emergency release must remain effective.
- Define authorized after-hours entry separately. Confirm how an approved person enters, disarms where necessary, and leaves without changing access for everyone else.
Expected result: Completed arming changes the pilot entrance to its intended secured state, while required exit operation and approved after-hours access remain available.
Do not equate “lock” with disabling every credential. Exterior public access and authorized employee access are different policies. Write down which policy changes so the closing manager knows what the automation actually does.
Door-status verification
- Confirm that the door closes and latches reliably before adding automation. A dragging door, weak closer, or misaligned latch is a hardware problem, not a programming problem.
- Map the door-position sensor to the correct entrance. Verify that the reported open and closed states match the physical door.
- Configure available lock-status monitoring according to the hardware documentation. If the equipment reports only commands or door position, do not present that information as confirmed locking.
- Define the response when the door remains open or the lock reports a fault. Notify the responsible person and keep the closing check incomplete until the condition is resolved.
- Avoid repeated motor commands against a jammed or misaligned lock. Use the manufacturer’s fault-handling procedure rather than forcing retries.
Expected result: The system distinguishes a locking instruction from door closure and, where supported, actual lock status. An unresolved condition produces an actionable exception rather than a false success message.
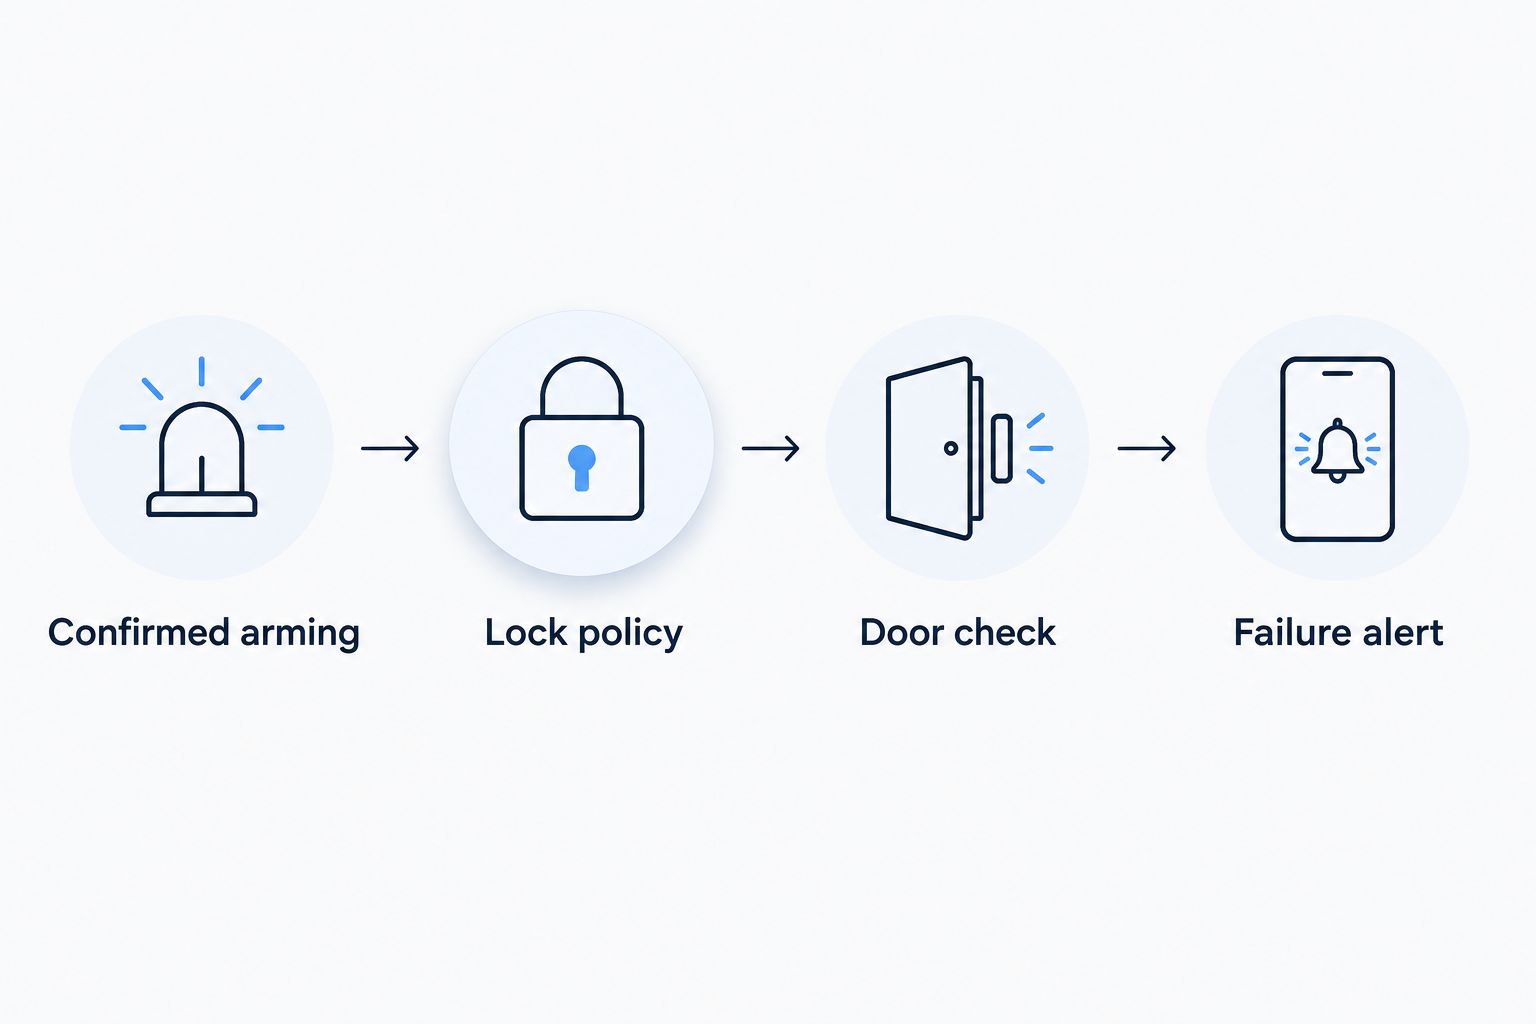
A useful sequence is Confirmed arming, Lock policy, Door check, and Failure alert. Each stage answers a different question: did the alarm arm, did access change, did the door reach the required state, and who responds if it did not?
Acceptance testing
- Arrange 2 authorized people for testing: one operates the system while the other observes door behavior. Coordinate alarm tests with the monitoring provider to avoid unintended dispatch.
- Check 3 operating conditions: normal closing, an open-door exception, and the documented response to a connection or power failure. Have qualified installers perform any electrical or life-safety tests.
- Confirm outside entry behavior and required inside exit operation. Test authorized after-hours access without assuming that disarming should unlock the entrance.
- Cancel an arming sequence and verify that the controller does not treat cancellation as successful closing. Repeat for relevant alarm partitions and operating modes.
- Save the approved configuration and write a short closing procedure. Include the person who receives faults, the fallback locking check, and the process for requesting changes.
Expected result: Staff can identify successful closing and failed closing without guessing. The installer has verified emergency-release and failure behavior under the approved design.
Before expanding the 2026 configuration, repeat acceptance testing for each additional door. Similar-looking entrances can have different locks, sensors, or exit requirements.
Lock remaining entrances after partial arming
Partial arming is a useful second workflow when part of a building remains occupied. For example, a business can secure a closed section while authorized staff continue working elsewhere. This requires alarm partitions and door groups that match the actual occupancy plan.
- Identify the separately armed area and its associated entrances.
- Apply the locking action only to that area’s approved door group.
- Preserve required exit routes for everyone remaining inside.
- Check that arming the closed area does not change another tenant’s or department’s access.
- Test later transitions to full-building arming and back to disarmed operation.
Expected result: Arming one area secures only its intended entrances. Occupied areas retain the access and exit behavior specified in the approved design.
Do not create a matching automatic-unlock rule just because automatic locking works. Disarming proves that someone changed the alarm state; it does not establish that public entry should begin. Keep public unlocking tied to an approved schedule or a separately authorized action.
For a 2026 change involving cleaners, delivery staff, or shared tenants, confirm each group’s access requirements before enabling partial-arming automation.
Troubleshooting
Doors lock during the exit countdown
Fix the trigger, not the countdown length. Check whether the rule uses an arm request, an arming-in-progress event, or completed arming. Select the documented completed state for the intended closing mode, then test cancellation and the final exit sequence again.
The controller says locked, but the door is open
Check what the status actually measures. A command acknowledgment does not prove physical closure. Inspect the closer, latch alignment, sensor mapping, and available lock feedback; correct hardware problems before changing the rule.
A door unlocks again after successful arming
Check competing access rules. A scheduled public-entry period or another automation can change the door after the closing action. Have the installer review priorities and define the armed-state restriction without defeating required emergency release.
Disarming does not restore expected access
Review the disarmed-state policy separately. Confirm whether disarming should restore credential access, resume a schedule, or leave the door secured. Remove assumptions from the workflow: an alarm transition is not automatically a public-unlock instruction.
The workflow stops during an outage
Use the documented failure procedure. Check controller logs, power status, communication health, and the installed lock’s power-loss behavior. Do not change fail-safe or fail-secure hardware behavior to fix an automation fault; the installer must preserve the approved exit and security arrangement.
Customize your workflow
Expand only after the pilot door passes testing. Add entrances by alarm area, give each door a clear operational name, and route exceptions to someone who can act on them. An unattended notification is not a completed closing check.
Keep the closing procedure short: confirm arming, check door exceptions, and resolve any failure before treating the building as secured. Retain an authorized fallback procedure when the connection is unavailable.
Apex Lock N Key’s commercial locksmith services cover lock and access-control installation. The benefit is support for the physical door work; the boundary is that this guide does not establish compatibility with your particular alarm or controller. Have the alarm provider confirm that part of the project.
For your 2026 handover, retain model details, the approved rule description, test records, and support responsibilities. Store credentials securely, not in the general closing checklist.
Discuss your commercial door setup
Ask about commercial lock and access-control installation in Middlesex County, Massachusetts.
FAQ
Can I automatically lock commercial doors when alarm arms?
Yes, with compatible electronic door hardware and a supported connection between the alarm and access-control system. Use confirmed arming as the trigger, preserve required exit operation, and verify the resulting door state.
Does an armed alarm mean every commercial door is locked?
No, an armed alarm does not prove that every door is locked. Door position, lock commands, and actual lock status are separate information, and confirmation depends on the installed monitoring hardware.
Should the doors lock when the exit countdown starts?
Use completed arming for the closing workflow described here, not the start of the exit countdown. The installer must verify the final exit sequence and ensure a canceled arm request does not create a false closing event.
Will locking the entrance stop employees from leaving?
The installation must preserve required exit operation. Have the installer verify the door hardware and emergency-release arrangement before enabling alarm-triggered locking.
Should commercial doors unlock automatically when the alarm is disarmed?
No, do not add automatic public unlocking by default. Disarming and allowing public entry are different decisions; use an approved schedule or separately authorized action for public access.
What happens if the internet or power fails?
The result depends on the installed controller, connection, power supply, and lock hardware. Have qualified installers verify the documented failure behavior and provide an authorized fallback closing procedure.
Can Apex Lock N Key help with commercial door automation?
Apex Lock N Key provides commercial lock and access-control installation in Middlesex County, Massachusetts. Confirm the proposed door work with the company and arrange alarm integration or programming with the responsible alarm provider.
One last thing
The best final check is an exception check, not another lock command. If the door is propped open, a repeated command cannot close it. Build the workflow around identifying the unresolved condition and getting the right person to respond.
Before leaving, know exactly what your system’s success indication means. Command accepted, door closed, and lock secured are not interchangeable.